


Setting Up Jumpcloud Single Sign-On (SSO) for ArgoCD: A Step-by-Step Guide
This article is useful for those who are actively simplifying the authentication process using SSO, especially with Jumpcloud.


This guide walks you through integrating Jumpcloud Single Sign-On (SSO) with ArgoCD, enabling your users to access ArgoCD with their existing Jumpcloud credentials. This streamlines authentication, improves security, and simplifies user management.
Introduction
Single Sign-On (SSO): SSO allows users to access multiple applications with a single login, reducing password fatigue and enhancing security.
Jumpcloud: A cloud-based directory platform providing user management, access control, and SSO functionalities.
ArgoCD: An open-source GitOps tool for declarative management of Kubernetes applications.
Integrating Jumpcloud SSO with ArgoCD offers several benefits:
Centralized User Management: Manage user access and permissions from a single location in Jumpcloud.
Enhanced Security: Eliminate the need for separate login credentials for ArgoCD, reducing the risk of breaches.
Streamlined Login Experience: Users can access ArgoCD seamlessly using their familiar Jumpcloud credentials.
Prerequisites
An active Jumpcloud account with administrator privileges.
A functioning ArgoCD deployment with dex enabled (I used v2.10.4).
Basic understanding of Security Assertion Markup Language (SAML).
Step 1: Configuring Jumpcloud for SSO
1.1 Accessing admin portal
Log in to the Jumpcloud Admin Console at https://console.jumpcloud.com/login/admin. Use your Jumpcloud administrator credentials.
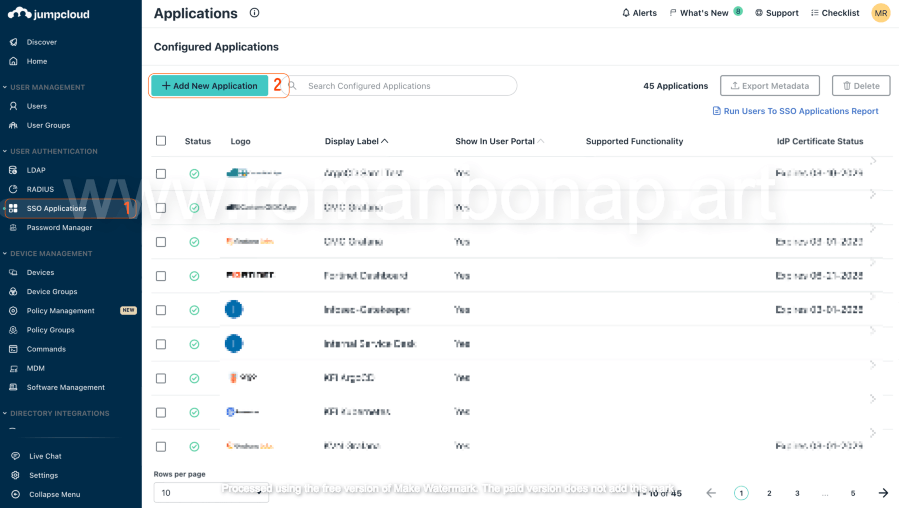
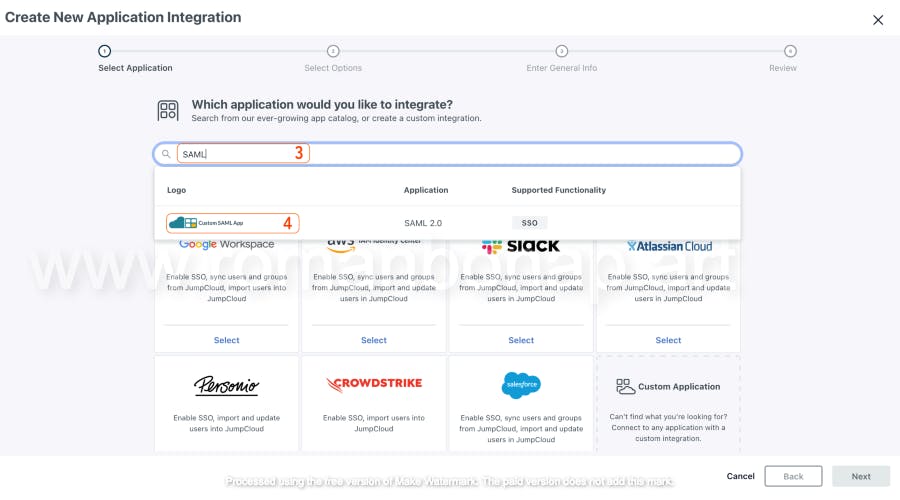
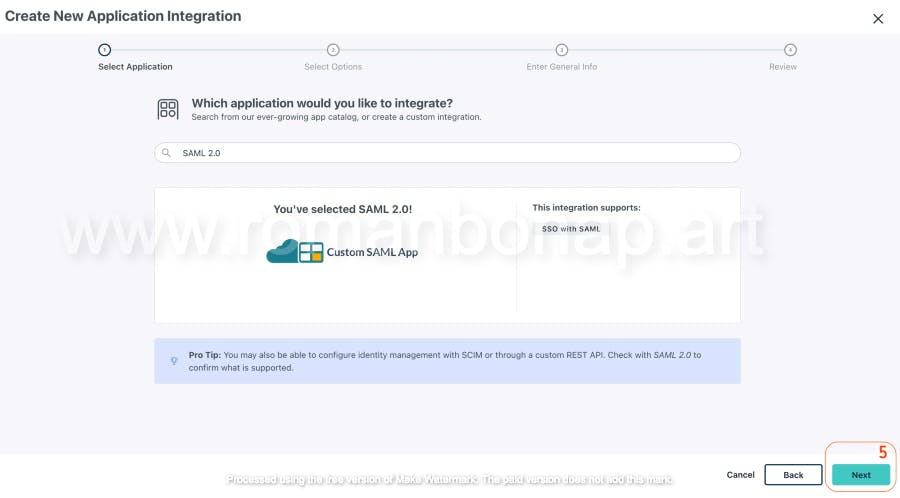
1.2 Creating a New SAML Connector
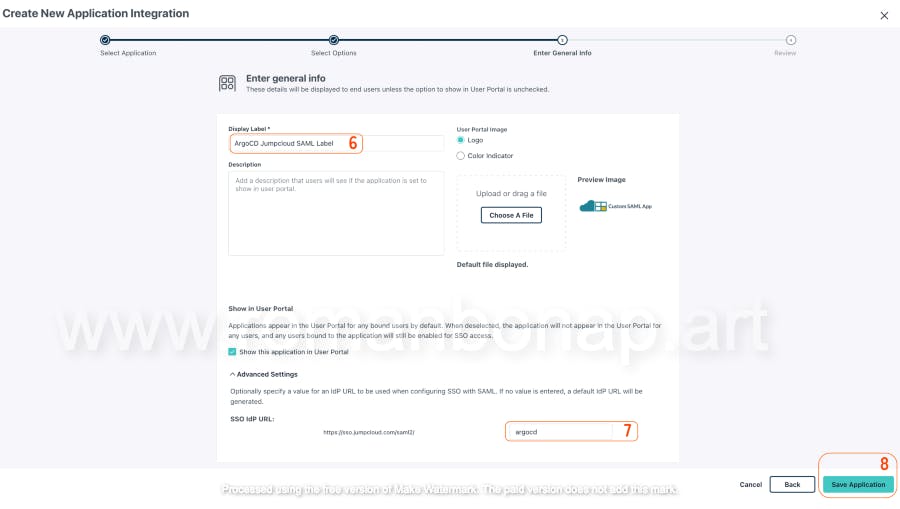
Navigate to the SSO Applications section and select SAML Connectors. Click Add New Application and choose Custom SAML App. Name the connector "ArgoCD" for easy identification. Don't forget to set the SSO IdP URL (Once created can't be changed)

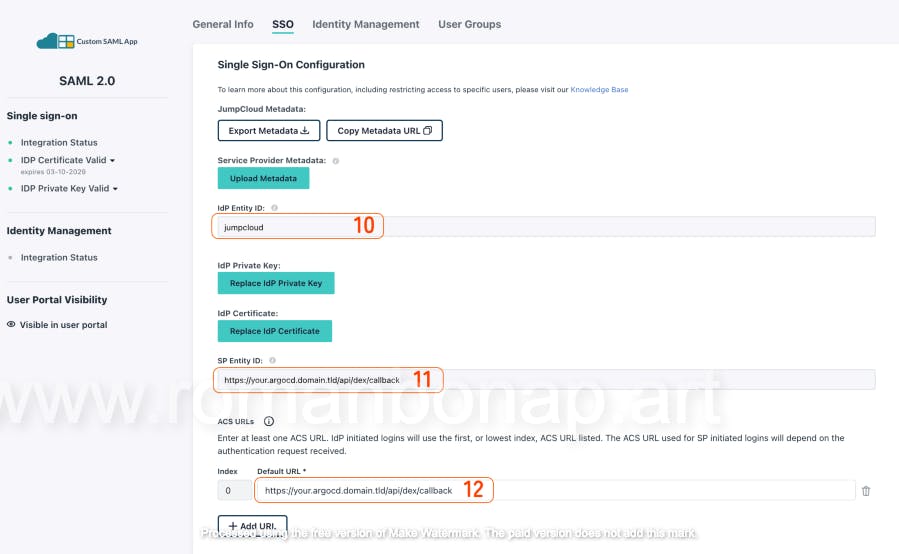
1.3 Configuring SAML Settings for ArgoCD:
- IdP Entity ID: Used to match the identity in the configuration (e.g., jumpcloud)
SP Entity ID: Enter the ArgoCD dex server api address (e.g., "argocd.example.com/api/dex/callback").
ACS URLs: Provide the ArgoCD login callback URL (e.g., "argocd.example.com/api/dex/callback").
SAMLSubject NameID: email
SAMLSubject NameID Format: urn:oasis:names:tc:SAML:1.0:nameid-format:u..
Signature Algorithm: Choose RSA-SHA256 for a secure connection.
Sign: Choose Response
Login URL: Enter the ArgoCD login address (e.g., "argocd.example.com/login"
Attributes:
Username: Map to the user's username address in Jumpcloud (e.g., "username").
Email: Map to the user's email address in Jumpcloud (e.g., "email").
Group Attributes: Check "include group attribute" and set the value to "memberOf"


Download the Jumpcloud certificate for later use with ArgoCD configuration.
Step 2: Configuring ArgoCD to Use Jumpcloud SSO
2.1 Accessing ArgoCD Configuration Files
Use kubectl get configmaps to identify the configuration maps named argocd-cm and argocd-rbac-cm. These contain settings for ArgoCD and RBAC (Role-Based Access Control).
2.2 Updating ArgoCD Configuration for SSO
Edit the
argocd-cmconfig map.Locate the
dex.configsection and update it with the following configuration snippet, replacing placeholders with your values:data: admin.enabled: "false" application.instanceLabelKey: argocd.argoproj.io/instance dex.config: | logger: level: info format: json connectors: - type: saml id: jumpcloud name: Jumpcloud config: ssoURL: https://sso.jumpcloud.com/saml2/argocd caData: | $(base64 < /path/to/jumpcloud_root_ca.pem) entityIssuer: https://argocd.example.com/api/dex/callback redirectURI: https://argocd.example.com/api/dex/callback usernameAttr: username emailAttr: email groupsAttr: memberOf
Update the argocd-rbac-cm config map to define user roles and permissions within ArgoCD based on Jumpcloud groups.
2.3 Applying the Configuration Changes
Save the updated configuration maps and apply them using kubectl apply -f <config_map_file.yaml>. Restart the ArgoCD pods using kubectl rollout restart deployment argocd-server.
Step 3: Testing the SSO Integration
3.1 Initiating a Login from ArgoCD
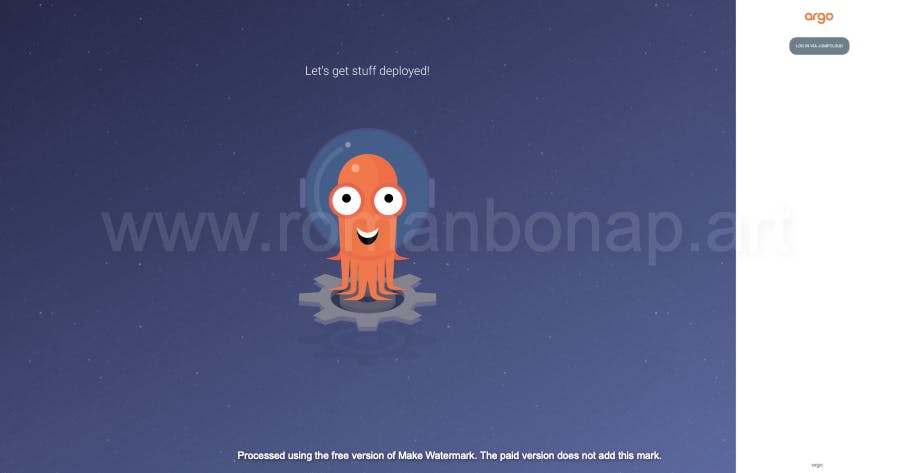
Access the ArgoCD web interface (e.g., "argocd.example.com/login"), click LOG IN VIA JUMPCLOUD. You should be redirected to the Jumpcloud login page. Enter your Jumpcloud credentials to authenticate.
3.2 Verifying Successful Authentication
Upon successful authentication, Jumpcloud will redirect you back to ArgoCD, where you should be logged in with your associated user permissions.
Step 4: Managing Users and Groups in Jumpcloud
4.1 Creating Users in Jumpcloud
Add new users to your Jumpcloud directory by navigating to the Users section.
4.2 Assigning Users to the ArgoCD Application
In Jumpcloud, navigate to the SSO Applications section and select the "ArgoCD" SAML connector you created earlier.
Under Assigned Users, you can add individual users or entire groups to grant them access to ArgoCD through SSO.
4.3 Managing Groups and Permissions
Create groups in Jumpcloud to manage user permissions within ArgoCD.
In the "ArgoCD" SAML connector settings, map Jumpcloud groups to specific ArgoCD RBAC roles (e.g., "admin," "edit," "view").
Update the
argocd-rbac-cmconfig map to define these RBAC roles and their corresponding permissions within ArgoCD. You can use tools like https://argo-cd.readthedocs.io/en/stable/operator-manual/rbac/ to simplify RBAC management.
Troubleshooting
Verify the Jumpcloud connector configuration and ArgoCD server address are correct.
Ensure the Jumpcloud Root CA certificate is properly encoded in the
argocd-cmconfig map.Check ArgoCD logs for any errors related to SAML authentication.
Make sure argo-cd deployment was restarted
Conclusion
This guide has walked you through setting up Jumpcloud SSO for ArgoCD. By following these steps, you've achieved:
Centralized user management for ArgoCD through Jumpcloud.
Enhanced security with SSO authentication.
Streamlined user access for a smoother ArgoCD experience.